With the fall season arriving, SO many things are changing. The sweaters and scarves have come out of the closet, the air has that wonderful, crisp, twinge to it, pumpkin and fall scented candles are coming back and can I say, I am in FULL welcoming of all these things! I love the fall season.
The fall season reminds me of alot of things, one of those things being when I had fallen head-over-heels in love with the most handsome man ever. He always spoils me and treats me SO special.
So, then I got to thinking..... What could I do for Austin that had the same hand picked and unique quality that he always exhibited for me? Sure, I could get him flowers and I am certain he would love them because they would have came from someone who loves him more than anything, but, then I came up with a better idea. As the old saying goes, "To get to a man's heart, you have to go through their stomach" and that is exactly what I decided to do.
This is how the "Man Bouquet" came into existence.
 |
| First, I needed to get everything I would need to put this bouquet together. |
I used a vase that we had from a previous arrangement, colored tissue paper, floral foam that florists use sometimes when putting arrangements together, and skewers to act as the "flowers". This one happened to be fall themed, so I matched my colors and embellishments accordingly.
 |
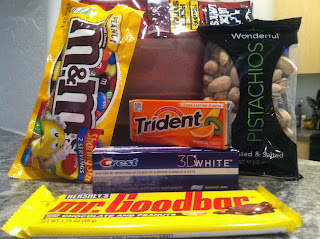
| The important stuff |
I also bought some little things that I knew that were his favorites that would speak directly to his stomach. I tried to buy things that I could make little sayings out of like, "You are SUCH a GoodMAN," (for the Mr. Goodbar) and "Honey, you're ROASTING!" (for the honey roasted peanuts).
After accumulating these items, I got to work.
 |
| I made an impression on the foam so I knew how much to cut off so that it would fit into my vase. |
 |
| After cutting it down, it fit into the vase like so. You want to make sure that the tissue paper surrounds it so that it cannot be seen from the outside of the vase. |
 |
| Once all the "flowers" were in place, I took the foam and put it back into the vase. Careful to make sure that the tissue paper in the vase is covering the foam from the bottom. |
Have fun creating!


No comments:
Post a Comment